iOS - Masonry自动布局(Autolayout)

前言

Masonry是一个轻量级的布局框架 拥有自己的描述语法 采用更优雅的链式语法封装自动布局 简洁明了 并具有高可读性 而且同时支持 iOS 和 Max OS X。
官方的介绍其实是非常详细的了,可以移步到其Masonry-Github下载官方源码Demo,我也非常推荐看官方的介绍。

介绍

使用过官方的NSLayoutConstraints的话,应该会很清楚它过于繁琐和麻烦,而使用Masonry,它遵循链式编程思想,其结构简单,使用方便,就像他的简介一样。

首先我们来看下官方的Autolayout代码

1
2
3
4
5
6
7
8
9
10
11
12
13
14
15
16
17
18
19
20
21
22
23
24
25
26
27
28
29
30
31
32
33
34
35
36
37
38
39
40
41
42
43
44
45
46
  UIView *superview = self;

UIView *view1 = [[UIView alloc] init];
view1.translatesAutoresizingMaskIntoConstraints = NO;
view1.backgroundColor = [UIColor greenColor];
[superview addSubview:view1];

UIEdgeInsets padding = UIEdgeInsetsMake(10, 10, 10, 10);

[superview addConstraints:@[

//view1 constraints

[NSLayoutConstraint constraintWithItem:view1
attribute:NSLayoutAttributeTop
relatedBy:NSLayoutRelationEqual
toItem:superview
attribute:NSLayoutAttributeTop
multiplier:1.0
constant:padding.top],

[NSLayoutConstraint constraintWithItem:view1
attribute:NSLayoutAttributeLeft
relatedBy:NSLayoutRelationEqual
toItem:superview
attribute:NSLayoutAttributeLeft
multiplier:1.0
constant:padding.left],

[NSLayoutConstraint constraintWithItem:view1
attribute:NSLayoutAttributeBottom
relatedBy:NSLayoutRelationEqual
toItem:superview
attribute:NSLayoutAttributeBottom
multiplier:1.0
constant:-padding.bottom],

[NSLayoutConstraint constraintWithItem:view1
attribute:NSLayoutAttributeRight
relatedBy:NSLayoutRelationEqual
toItem:superview
attribute:NSLayoutAttributeRight
multiplier:1
constant:-padding.right],

]];

看见这样的约束,是不是感到头大,很简单的事件,却变得繁琐起来,对于开发来说,完全是得不偿失的事情,如此还不如用CGRectMake来的省心。
而使用Masonry,看以下代码

1
2
3
4
5
6
7
8
  UIEdgeInsets padding = UIEdgeInsetsMake(10, 10, 10, 10);

[view1 mas_makeConstraints:^(MASConstraintMaker *make) {
make.top.equalTo(superview.mas_top).with.offset(padding.top); //with is an optional semantic filler
make.left.equalTo(superview.mas_left).with.offset(padding.left);
make.bottom.equalTo(superview.mas_bottom).with.offset(-padding.bottom);
make.right.equalTo(superview.mas_right).with.offset(-padding.right);
}];

甚至更短

1
2
3
  [view1 mas_makeConstraints:^(MASConstraintMaker *make) {
make.edges.equalTo(superview).with.insets(padding);
}];

.equalTo相当于NSLayoutRelationEqual

.lessThanOrEqualTo相当于NSLayoutRelationLessThanOrEqual

.greaterThanOrEqualTo相当于NSLayoutRelationGreaterThanOrEqual

安装

普遍的两种安装方法:

1.直接进入github进行源码下载 引入头文件#import "Masonry.h"

2.使用CocoaPod进行下载 pod 'Masonry'

使用

Masonry支持的属性

1
2
3
4
5
6
7
8
9
10
11
@property (nonatomic, strong, readonly) MASConstraint *left;
@property (nonatomic, strong, readonly) MASConstraint *top;
@property (nonatomic, strong, readonly) MASConstraint *right;
@property (nonatomic, strong, readonly) MASConstraint *bottom;
@property (nonatomic, strong, readonly) MASConstraint *leading;
@property (nonatomic, strong, readonly) MASConstraint *trailing;
@property (nonatomic, strong, readonly) MASConstraint *width;
@property (nonatomic, strong, readonly) MASConstraint *height;
@property (nonatomic, strong, readonly) MASConstraint *centerX;
@property (nonatomic, strong, readonly) MASConstraint *centerY;
@property (nonatomic, strong, readonly) MASConstraint *baseline;

这些属性与NSLayoutAttrubute的对照表如下

Masonry NSAutoLayout 说明
left NSLayoutAttributeLeft 左侧
top NSLayoutAttributeTop 上侧
right NSLayoutAttributeRight 右侧
bottom NSLayoutAttributeBottom 下侧
leading NSLayoutAttributeLeading 首部
trailing NSLayoutAttributeTrailing 尾部
width NSLayoutAttributeWidth 宽
height NSLayoutAttributeHeight 高
centerX NSLayoutAttributeCenterX 横向中点
centerY NSLayoutAttributeCenterY 纵向中点
baseline NSLayoutAttributeBaseline 文本基线

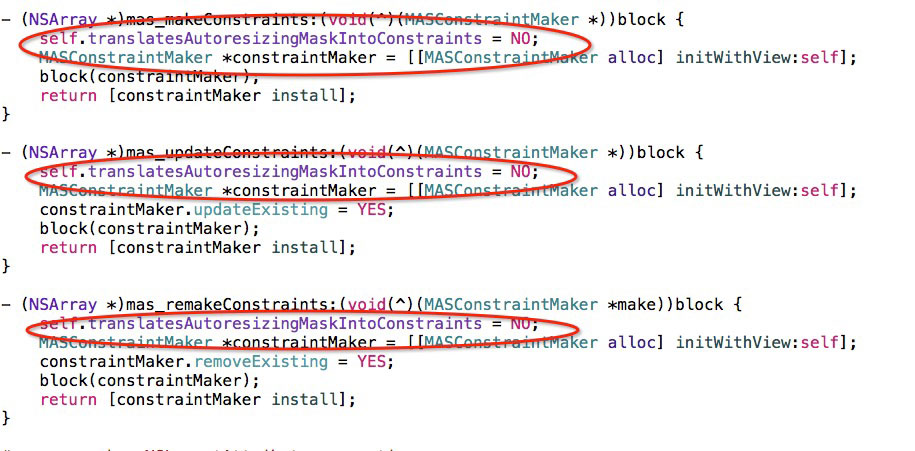
在使用Masonry的时候,我们不需要在手写 self.translatesAutoresizingMaskIntoConstraints = NO;,点进Masonry头文件,查看起方法,我们可以看到他每个方法里面都帮我们加上了这句话。
另外需要注意的是在xib或者storyboard中使用masonry框架相关方法的时候要将use Auto layout选项去掉,否则会不起作用。

1.显示一个View

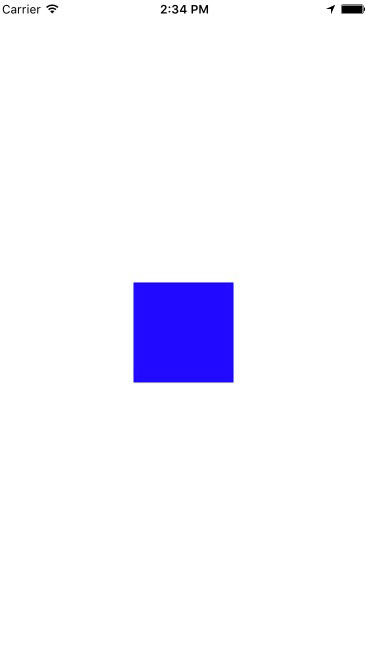
我们创建一个项目, 在其中间放上一个尺寸100*100,父视图居中的View

1
2
3
4
5
6
7
8
9
10
UIView * blueView= [UIView new];
blueView.backgroundColor = [UIColor blueColor];
[self.view addSubview:blueView];
[blueView mas_makeConstraints:^(MASConstraintMaker *make) {

//尺寸100*100 ,父视图居中
make.width.equalTo(@100);
make.height.mas_equalTo(100);
make.center.equalTo (self.view);

}];

居中View

我们来每行逐一讲解以下,

-首先注意一点,在我们使用masonry约束的时候,一定要先将view先添加到superview上 否则会报错。[self.view addSubview:blueView];

-[blueView mas_makeConstraints:^(MASConstraintMaker *make) { }];这是一个Block块,mas_makeConstraints就是Masonry的autolayout添加函数 将所需的约束添加到block中即可。

  • make.width.equalTo(@100);约束其宽度为100,make.height.mas_equalTo(100);约束其高度为100,

  • make.center.equalTo (self.view);设置对self.view居中。

对于以上几个地方,我们来简单说下,
首先在Masonry中能够添加autolayout约束有三个函数

1
2
//mas_makeConstraints 只负责新增约束 Autolayout不能同时存在两条针对于同一对象的约束 否则会报错 
- (NSArray *)mas_makeConstraints:(void(^)(MASConstraintMaker *make))block;
1
2
//mas_updateConstraints 针对上面的情况 会更新在block中出现的约束 不会导致出现两个相同约束的情况
- (NSArray *)mas_updateConstraints:(void(^)(MASConstraintMaker *make))block;
1
2
//mas_remakeConstraints 则会清除之前的所有约束 仅保留最新的约束
- (NSArray *)mas_remakeConstraints:(void(^)(MASConstraintMaker *make))block;

在我们清楚了这几个函数的使用条件后,便可轻松应对

在上面代码中 make.width.equalTo(@100);和make.height.mas_equalTo(100);都是约束代码,但一个使用的是equalTo另一个是mas_equalTo,同样的效果,那他们的区别在哪里呢?其实mas_equalTo是一个MACRO,比较的是值,直接填写数字即可,equalTo比较的是view,是个对象,需要将里面的东西添加@转成ID类型,当然我们也可以用 make.size.mas_equalTo(CGSizeMake(100, 100));来直接设置宽高,make我们则看做当前对象,就像self一样。

2.让View的高度是宽度的一倍

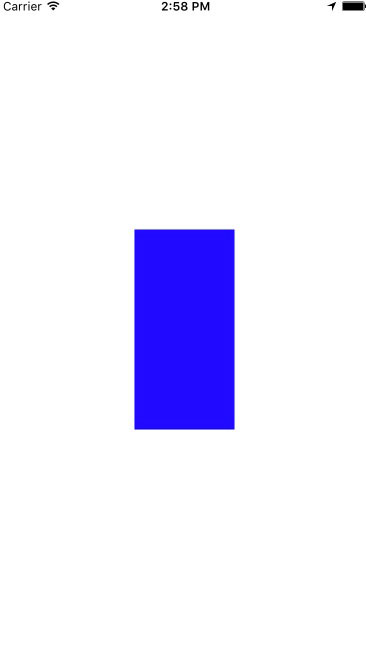
还是刚才的代码, 我们在上面添加约束,

1
2
3
4
5
6
7
8
9
10
11
UIView * blueView= [UIView new];
blueView.backgroundColor = [UIColor blueColor];
[self.view addSubview:blueView];
[blueView mas_makeConstraints:^(MASConstraintMaker *make) {
//尺寸100*100 ,父视图居中
make.width.equalTo(@100);
make.height.mas_equalTo(100);
make.center.equalTo (self.view);
make.height.equalTo(blueView.mas_width).multipliedBy(2.f).offset(0.f);

}];

我们可以看到在约束中,我们可以直接使用multipliedBy函数,并设置offset。
如果我们将offset设置为100,也就是宽的大小
make.height.equalTo(blueView.mas_width).multipliedBy(2.f).offset(100.f);
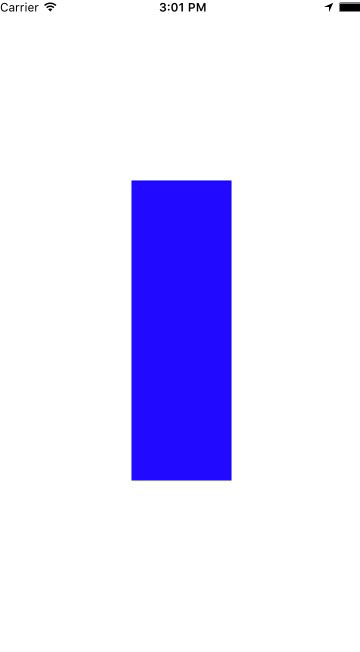
用链式语法去读它,你可以这样读,它的高度是它宽度的2倍加上100.

我们不光可以对其宽高设置,也可以对它的center,edges,size等,同时也可以设置它的优先级

1
make.edges.equalTo(self.view).insets(UIEdgeInsetsMake(50, 50, 50, 50));
1
make.size.equalTo(self.view).sizeOffset(CGSizeMake(-100, -100));
1
make.center.equalTo(self.view).priority(MASLayoutPriorityFittingSizeLevel);

我应该在哪里使用约束?

对于这个问题,直接看官方给的以下代码

1
2
3
4
5
6
7
8
9
10
11
12
13
14
15
16
17
18
19
20
21
22
23
24
25
26
27
28
29
30
31
32
33
34
35
36
37
38
39
@implementation DIYCustomView

- (id)init {
self = [super init];
if (!self) return nil;

// --- 在这里创建的你View ---
self.button = [[UIButton alloc] init];

return self;
}

// tell UIKit that you are using AutoLayout
+ (BOOL)requiresConstraintBasedLayout {
return YES;
}

// this is Apple's recommended place for adding/updating constraints
- (void)updateConstraints {

// --- 在这里删除和更新你的约束
[self.button remakeConstraints:^(MASConstraintMaker *make) {
make.width.equalTo(@(self.buttonSize.width));
make.height.equalTo(@(self.buttonSize.height));
}];

//according to apple super should be called at end of method
[super updateConstraints];
}

- (void)didTapButton:(UIButton *)button {
// --- 改变控件,会影响你的布局 ---
self.buttonSize = CGSize(200, 200);

// 更新约束
[self setNeedsUpdateConstraints];
}

@end

结尾

Masonry是一款非常好用的第三方约束, 本文只是简单介绍了它的使用, 相信你对它也有了一定的了解,它的出现对一些喜欢纯代码的童鞋给予了极大的便利,比如我。。,需要更多的了解它,最好去看他的Github,下载他的示例Demo,你会发现他更强大的地方。 当然你也可以继续关注本blog,我会在以后更深入的讲解它的使用。

本文的示例代码, 可以到这里下载。

文章目录
  1. 1. 前言
  2. 2. 介绍
  3. 3. 安装
  4. 4. 使用
    1. 4.1. 1.显示一个View
    2. 4.2. 2.让View的高度是宽度的一倍
    3. 4.3. 我应该在哪里使用约束?
    4. 4.4. 结尾